BC Open Source? How to start?
One of the most exciting news introduced last month in Lyon during Directions EMEA 2023 was the changes to the open-source initiative. This means that you can now contribute to the source code of the Base app and the System app, which are now based on the main development version (next-major) branch.
In this blog post, I will guide you through the steps to start with the open-source development for Business Central. You will learn how to clone the repositories, set up your development environment, make changes to the code, and submit pull requests to contribute to the project.
Please note
Microsoft is still determining the best strategies and configuration for their open-source BC programs. That means there can be changes to the process, setup, permission etc., without any announcement.
I will try to keep this article updated, but if you have any troubles, let me know – Yammer, Twitter/X, LinkedIn or using my email kapitan@kepty.cz.
Different repositories for different parts of the system
- To contribute to the Base Application, use the BusinessCentralApps repository.
- This is a private repository, but you can request access by filling out this form.
- !!! As this is a private repository, you won’t see the repository without being granted access by Microsoft !!!
- To contribute to the System Application or Developer Tools, use the BCApps repository.
- To contribute to Microsoft’s 1st party apps, use the ALAppExtensions repository.
- Use this repository also for any publisher requests, requests to change access modifiers (local/internal->public) and requests to replace option field/variable by enum. The official repository description:
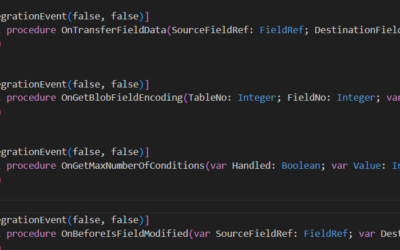
- Add new integration events – Get the event you need to hook into a process.
- Change function visibility – For example, make a public function external or a similar change so you can call it from your extension and reuse the business logic.
- Replace Option with Enum – Replace a specific option with an enum that supports your extension. The new type enum is extensible, but all code was written for non-extensible options.
- Extensibility enhancements – Request changes in the application code that will improve extensibility.
- Use this repository also for any publisher requests, requests to change access modifiers (local/internal->public) and requests to replace option field/variable by enum. The official repository description:
Let’s start with contributions – get your repository ready
Before making any changes to the code, you need to create a fork of the repository you want to contribute to (choose the correct repository using the matrix above). A fork is a copy of a repository that you can modify without affecting the original one. To create a fork, go to the repository page on GitHub (select the “Code“ tab) and click on the Fork button in the top-right corner. This will create a fork under your GitHub account.
Next, you need to clone your fork to your local machine. To do this, open Visual Studio Code and select Clone Repository from the Welcome page or the Command Palette (Ctrl+Shift+P). Enter the URL of your fork, which should look like this: https://github.com/yourGitHubName/RepositoryName.git. Choose a folder where you want to store the code and click Clone.
You can also clone the repository using the command line:
> git clone https://github.com/yourGitHubName/RepositoryName.gitNow, you have a local copy of the code that you can edit and test. You can also sync your fork with the original repository to get the latest updates from Microsoft. To do this, you must add the original repository as a remote source and fetch its changes. You can use the GitLens extension for Visual Studio Code to manage your remotes and branches easily.
Create a local development environment.
Fortunately, Microsoft provides some useful scripts to help you set up a local development environment quickly and easily. In BusinessCentralApps, you can find them in the “\App\.AL-Go\” folder. These scripts will install the necessary dependencies, configure the environment, and deploy all extensions using the dev endpoint.
To start the script, use the following commands:
> cd C:\YourFolder\App\.AL-Go
> .\localDevEnv.ps1
Once you start the script, you must specify a few values. The default values are usually fine, except if you want to have multiple containers (but to be honest, I use the default name for my open-source container and custom names for all other containers I have). You don’t need to provide the license file, as the default Cronus license is now super-powerful and doesn’t need to be replaced by the dev license.
....
Checking System Requirements

Container name
--------------
Please enter the name of the container to create (default bcserver)
bcserver selected

Authentication mechanism for container
--------------------------------------
a Windows Authentication
b Username/Password authentication

Select authentication mechanism for container (default b)
Username/Password authentication selected

LicenseFileUrl
--------------
When developing PTEs, you can optionally specify a developer licensefile with permissions to object IDs of your dependant apps

Local path or a secure download URL to license file  (default none)
none selected
....
After you confirm the license file URL, the script will download the artifact of the version specified in the open-source repository. This step may take 5 to 10 minutes, depending on your connectivity.
Once the artifact is downloaded, you must confirm that you agree with the insider EULA.
....
Downloading using HttpClient
Updating app- and test Dependencies
Analyzing Test App Dependencies
Checking appDependencyProbingPaths
Press ENTER to accept the Business Central insider EULA (https://go.microsoft.com/fwlink/?linkid=2245051) or break the script to cancel:
....
Once you agree with the insider EULA, the script will continue preparing the environment and compiling and publishing the apps. This can also take 5 to 10 minutes, depending on the RAM allocated for the container and how powerful your computer is. I work on a laptop with 48 GB RAM allowing up to 16 GB RAM for this container.
....
{
    "type":  "al",
    "request":  "launch",
    "name":  "Local Sandbox (bcserver)",
    "server":  "http://bcserver",
    "serverInstance":  "BC",
    "port":  7049,
    "tenant":  "default",
    "authentication":  "UserPassword"
}

Compiling apps, test apps and importing test toolkit took 449 seconds

AL Pipeline finished in 592 seconds
Once you see this text, it is done! Your environment is prepared and ready for your first contribution!
Let’s start with our first contribution.
The first thing you can do is to get the issue you want to resolve. You can start by going to one of the repositories (links are in the first section of this post) on GitHub and look for issues that are not assigned to anyone and have the label “approved”.
You can comment on the issue and ask to be assigned to it (in the BaseApp repository, you can assign the issues by yourself). Alternatively, you can create a new issue and describe your proposed feature or bug fix. Wait for one of the maintainers to review and approve your issue before you start working on it!
Always follow the guidelines in the repository – for example, if they ask for the link to BC Idea, you MUST provide the link.
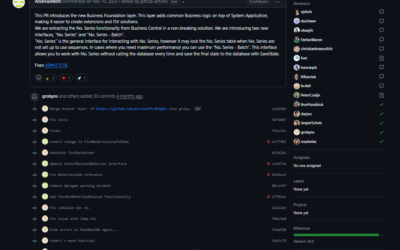
Example
Preparation
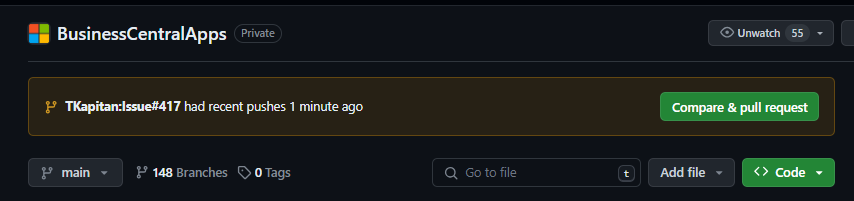
For this blog post, I will choose one of the approved issues in the BaseApp repository (Sales Quote Archive Confirmation – Wrong Language · Issue #417 · microsoft/BusinessCentralApps (github.com)). First, I check that the issue is approved (approved label) and that no one is assigned (+ comments as sometimes other contributors may forget to assign the ticket, and you don’t want to develop already developed change.
Once we know that no one is working on the issue, I can assign the issue to myself.

Now we can start the development. Open your VS Code and open the cloned repository (I personally do not use workspaces for this repository, but open directly the “C:\MyFolder\App\Layers\W1\BaseApp” folder).
Always make sure you are working on the latest version of the repository
- Go to your forked repository, click “Sync fork” and run the sync.
- Pull all changes from your forked repository (make sure you are in the main branch)
> git checkout main
> git pull
Now, once we know that we have the latest version, we can create a new dev branch. There are no rules about naming (as it will be in your forked repository only), but I always use “Issue#XXX” as the branch name.
> git checkout -b "Issue#417"You have your branch, and you can start with the development!
Development
(always remember that changes larger than minor should have automated tests covering new code!)
Publishing Changes
Once you develop all changes (or once you want to publish the changes, even as a draft pull request), push your changes to your remote forked repository, go to the original Microsoft repository and click on the “Company & pull request” button.
There are currently no rules about the name of the PR, but the best practice we use is to start the name with the ID of the issue (#XXX) followed by a useful name (it does not need to be the same name as the issue).
You must link the original issue to PR – you can do it manually by selecting the issue in the “Development” section or by adding “Resolves #XXX” as the PR description.
You should also (these steps are for the Base App repository only)
- Assign the PR to yourself.
- Set the label “Needs community review/approval”.

Once you have everything done, continue using the “Create pull request” button, and that’s all!
Now you need to wait for Microsoft and other contributors as the PR needs to be approved by the Community but also by Microsoft. You may get some inputs from the code review, so remember, the PR is not done until it’s merged to the main branch by Microsoft!